Dry ice fire extinguishers (carbon dioxide fire extinguishers) are suitable for putting out fires caused by various flammable and combustible liquids, flammable and combustible gases, as well as electrical equipment. Mastering the correct operating methods can effectively extinguish fires in critical moments and protect lives and property. The main operating steps are as follows
Preparations Before Us
1. Ensure a safe environment:Keep yourself out of danger. In case of heavy smoke at a fire scene, move forward in a low posture to avoid inhaling toxic fumes. If the fire is fierce, the on-site situation is complicated or there is a risk of explosion, do not attempt to put out the fire rashly. Evacuate immediately and dial the fire alarm number 119
2. Inspect the fire extinguisher:Check its exterior for damage, corrosion or deformation. Make sure the pointer of the pressure gauge stays in the normal green zone. If there is no pressure gauge, judge by weighing; its weight should match the marked weight under normal conditions
3. Take personal protective measures: The dry ice released by a dry ice fire extinguisher has an extremely low temperature and may cause frostbite. It is recommended to wear thick gloves before use.
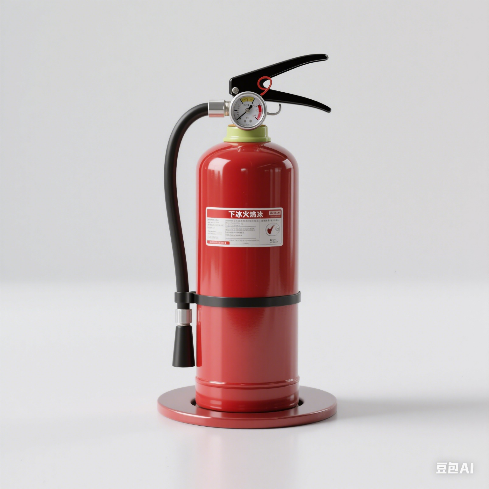
Operating Procedures
1. Retrieve the fire extinguisher:Hold the handle of the fire extinguisher with your right hand, and carry it steadily and quickly to the vicinity of the fire source. Keep the fire extinguisher upright while walking, and avoid violent shaking or collisions
2. Choose a standing position:Stop about 5 meters away from the fire source. You may move closer to around 3 meters if the fire is small. Stand on the upwind side to prevent yourself from being engulfed by smoke and flames during fire fighting, and ensure the extinguishing agent can fully cover the fire source
3. Activate the fire extinguisher:Turn the fire extinguisher upside down several times to loosen the dry ice inside the cylinder. This step may not be required for some newly designed models; follow the product instructions accordingly. Then pull out the safety pin, which is usually located under the pressure handle and appears as a red plastic ring or metal latch. Hook it with your fingers and pull it out firmly
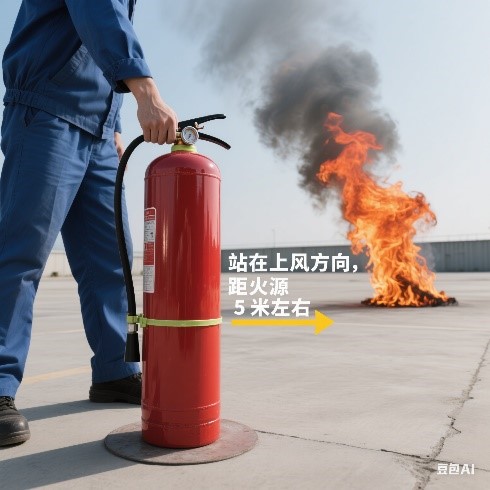
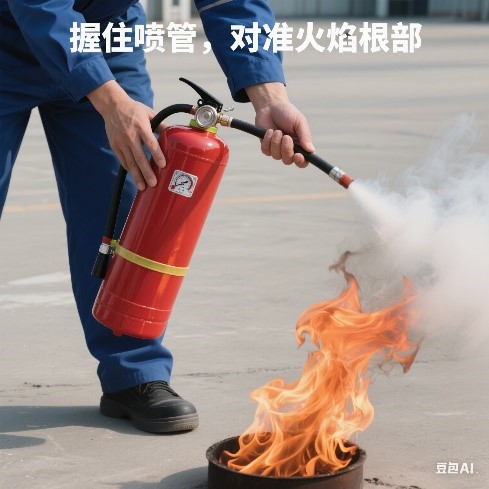
4. Aim at the fire source:Hold the front end of the nozzle with one hand (do not touch the metal part of the nozzle to avoid frostbite) and direct the nozzle at the base of the flame. Grip the pressure handle of the fire extinguisher tightly with the other hand. For a simple dry ice fire extinguisher without a nozzle, tilt the horn upwards by 70 to 90 degrees and aim it at the base of the flame as well
5. Spray to put out the fire:Press down the pressure handle firmly, and the dry ice extinguishing agent will spray out from the nozzle rapidly. Keep the fire extinguisher upright, and sweep it from side to side at a steady and slow pace to let the dry ice cover the fire source evenly. Move gradually from the edge of the flame towards the center until the fire is completely put out
Post-use Procedure
1. Check for embers:Do not leave the scene immediately after the fire is put out. Keep observing for several minutes to prevent re-ignition. If there are remaining sparks, spray a small amount of dry ice with a fire extinguisher to put them out, or cover the sparks with other materials such as sand
2. Mark and record:Put marks on the used fire extinguisher, and record information including the time, location and details of the fire. Notify the relevant person in charge in a timely manner. Used fire extinguishers must be refilled or replaced and shall not be used for fire fighting again directly
3. Replace and store:If the fire extinguisher is not fully exhausted and still functional, wipe it clean and put it back in the designated storage place. The storage area shall be dry, ventilated and cool. Keep it away from direct sunlight, high temperature environments and corrosive substances
Notes
1.Prevention of frostbite:During the use of a dry ice fire extinguisher, the nozzle and ejected dry ice have an extremely low temperature. Never touch the nozzle, the outer wall of the horn and metal connecting pipes with your hands to avoid skin frostbite
2. Not applicable to metal fires:Dry ice fire extinguishers cannot be used to put out fires involving active metals such as potassium, sodium, magnesium and titanium. These metals will react with carbon dioxide at high temperatures and fuel the fire
3. Cautions for use in enclosed spaces:After using a dry ice fire extinguisher in indoor or other enclosed spaces, all personnel must evacuate immediately. Excessively high carbon dioxide concentration may cause suffocation. Do not enter the area until adequate ventilation is achieved and the carbon dioxide concentration drops to a safe level
4. Regular maintenance and inspection:Have professionals conduct regular maintenance and inspections on dry ice fire extinguishers, including pressure tests, visual checks and tightness inspections, to ensure the extinguishers are in good working condition at all times
5. No unauthorized repair or refilling:Non-professionals are prohibited from disassembling, repairing or refilling dry ice fire extinguishers, as this may lead to dangers. If any malfunction or abnormal pressure is found, contact a professional fire equipment maintenance agency in a timely manner
Emergency shower and eyewash station is an essential safety device. When the eyes or body come into contact with hazardous substances, it can deliver prompt and effective flushing to reduce injuries caused by chemicals to the eyes and skin. Below are the detailed operating procedures and relevant precautions for emergency shower and eyewash stations.
Introduction to the structure of the eyewash station
1.Eye-washing section
Eye Wash Nozzle:Located on the upper part of the eyewash station, it is the outlet for water flow. Usually designed with a special shape, it can spray water evenly and gently onto the eyes to ensure effective flushing. A dust cover is generally fitted on the outside of the nozzle to prevent foreign matter from entering, which needs to be opened before use.
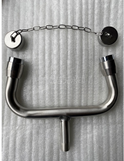
2.Shower Section
Shower Nozzle:Located on the top of the eyewash station. It is relatively large and delivers a wide stream of water to rinse the body when large areas of skin are exposed to hazardous chemicals.
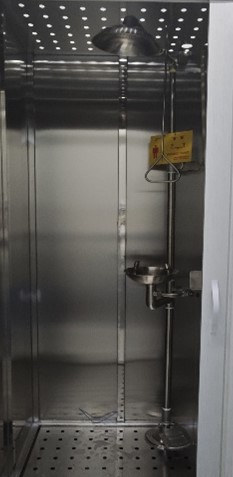
3.Other components
Main Bracket:It supports and secures the entire eyewash station to keep the equipment stable, and is generally made of corrosion-resistant and high-strength materials.
Connecting Pipes:They link the water source to the eyewash nozzles and shower nozzles to deliver clean water. The pipes are required to be pressure-resistant and corrosion-resistant to ensure smooth water flow.
After learning about the structure of the eyewash station, here are the specific operating procedures and relevant precautions.
Operating Steps
Eye Irrigation
1. Locate the eyewash station: If hazardous substances get into your eyes, stop work immediately and proceed to the emergency safety shower and eyewash station without delay.
2. Turn on the eyewash station: Gently lift the dust cover of the eyewash station (if equipped) by hand. Push the operating lever clockwise (or step on the pedal for pedal-type eyewash stations). The eyewash valve will open, and clean water will spray out automatically from the nozzles.
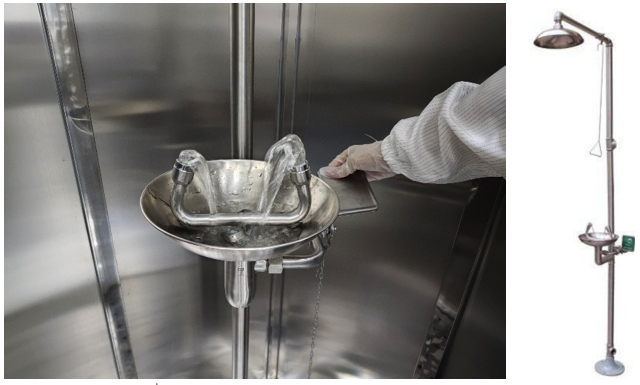
Push the hand-operated valve gently, and clean water will spray out automatically from the eyewash nozzle.
3. Rinsing:Bring your head close to the eyewash nozzle, hold your eyelids open with your fingers, and make sure both eyes are fully covered by the water flow. Open your eyes wide to let the water thoroughly flush the eyeballs and surrounding areas. The recommended rinsing duration is no less than 15 minutes. During rinsing, gently rotate your eyes to ensure all parts are completely cleaned.
,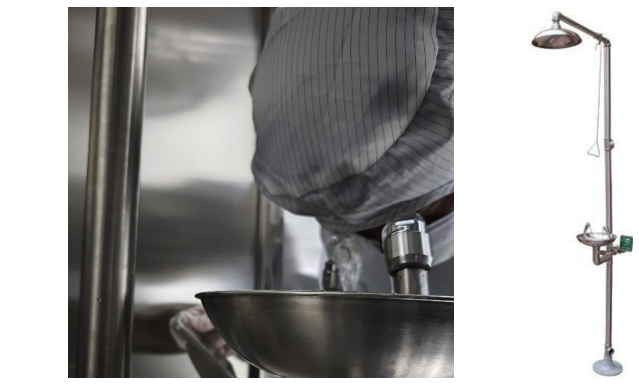
Rinse thoroughly with plenty of clean water for 15 minutes before bringing your eyes close to the eyewash nozzle
4.Turn off the eyewash station:After flushing, pull back the eyewash switch push plate counterclockwise (or release the pedal) to close the eyewash valve, then put the dust cover back in place.
Rinse other parts of the body
1.Locate the emergency shower:If a large area of your body comes into contact with hazardous chemicals, quickly proceed to the emergency shower and eyewash station.
2.Activate the shower:Pull the shower handle downwards. The shower valve will open at a 90-degree angle, and clean water will spray out automatically from the shower head.
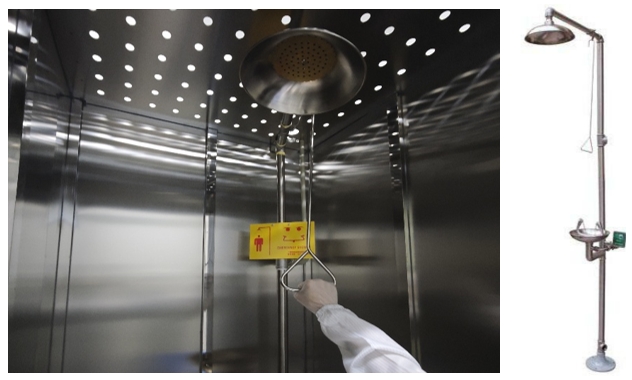
Pull the valve lever down by hand, and water will spray out automatically from the sprinkler hea
3. Take a shower rinse:Stand quickly under the shower head to get your whole body fully covered by water. Thoroughly rinse your head, face, neck, arms, legs and other body parts. Keep turning your body during the rinsing process to ensure every part is cleaned effectively, and the rinsing shall last no less than 15 minutes. Control the direction and pressure of the water flow, and avoid directing the water straight at sensitive areas such as the eyes.
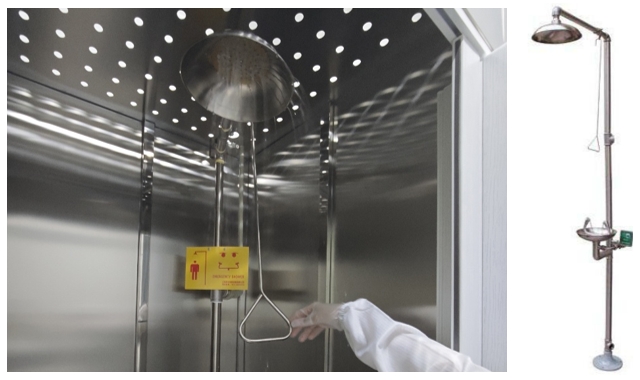
Stand under the sprinkler and rinse thoroughly with plenty of clean water
4.Turn off the shower unit:After rinsing, push the handle of the shower switch upward to close the shower valve.
Notes
1. If the eye injury is severe or symptoms do not subside after flushing, go to hospital for treatment immediately and inform the doctor in detail about the type of hazardous chemicals involved and the duration of exposure.
2. Keep the water flow continuous and stable during flushing. If the water flow weakens or stops, promptly check whether the valves and pipes are clogged or damaged.
3. Protect yourself and people nearby while flushing, and prevent the waste water from splashing onto others. If possible, place warning signs around the flushing area to keep unauthorized personnel away.
4. Do not rub your eyes during eye flushing, as this may damage the surface of the eyeball. If there are solid foreign objects in the eyes, do not attempt to remove them by yourself. Seek medical treatment as soon as possible after flushing.
5. Do not use the eyewash while wearing contact lenses. The impact of water flow may dislodge or shift the lenses and raise the risk of eye injury.
6. For special hazardous chemicals such as substances that react violently with water, check relevant safety documents or consult professionals before using emergency showers and eyewashes to avoid aggravating injuries due to improper flushing methods.
7. Conduct regular inspection and maintenance on emergency showers and eyewashes. Check their operating status at least once a week and perform comprehensive maintenance including inspection of water flow, nozzles and valves every month to ensure the equipment functions properly in emergencies.
8. All personnel who may come into contact with hazardous substances shall receive training on the use of emergency showers and eyewashes, and get familiar with operating procedures and precautions.